With this layout, you can get 8 Stars out of 4x8 sheet of corrugated
plastic. The diagram represents 1/4 of the sheet of Coro.
Once you have the pattern cut out, score the side of the coro that will
be on the inside of the bend when the star is folded. To make
the base, cut the star out of 1/2 inch plywood. Click on the Star
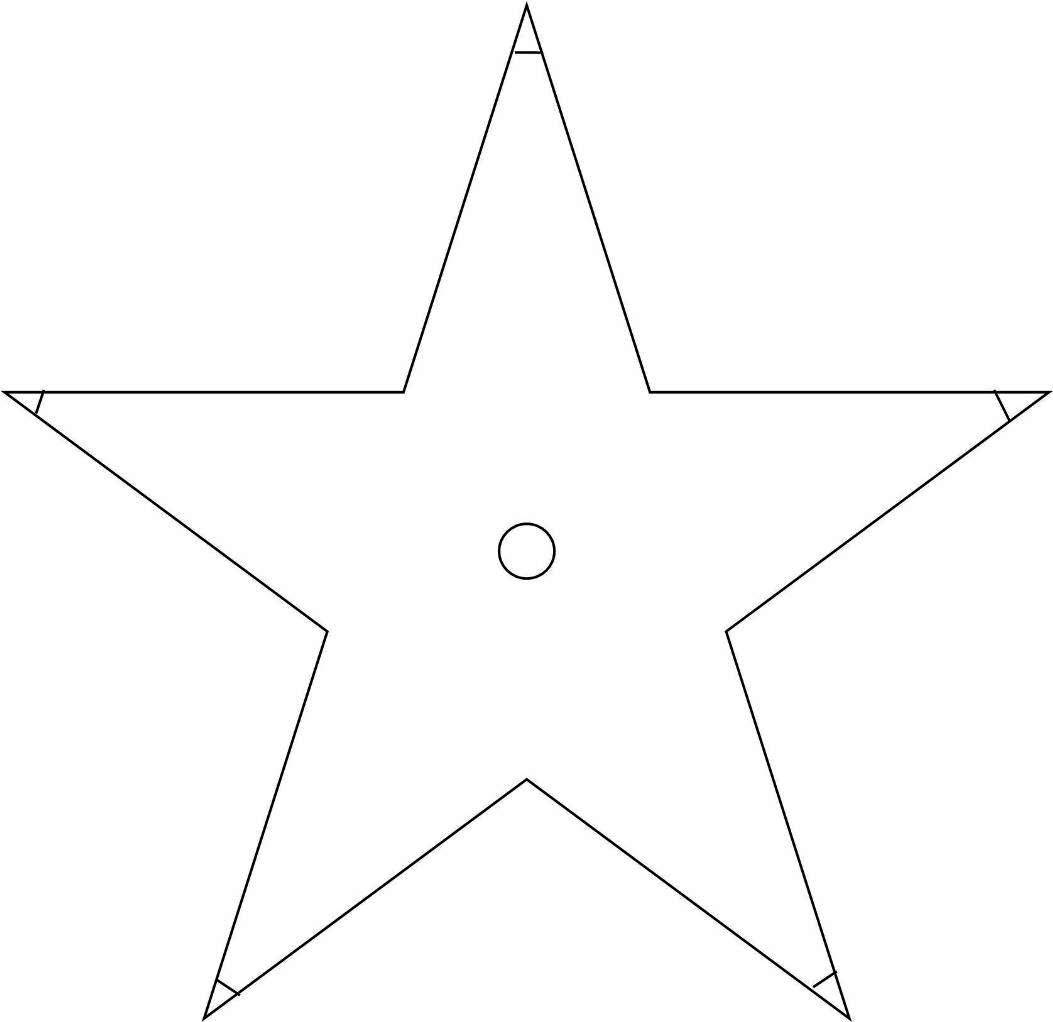
for a larger
image. Each of the 10 sides of the star should be 4 3/4 inches
each. Drill a hole in the center to run your light cords through.
Also cut off the tips of each point of the star for drainage.
Paint the bottom of the star with black paint. On my stars I used
2 cords, one with 2 green C7s and one with 2 red C7s. Once I
have the light cords attached I put some old bulbs in the sockets
and paint the base and the sockets with white spray paint.
Attach the coro shell to the base with screws at the 5 inner
points of the star base. Once the star is assembled use tape to
attach the 2 ends of the Coro shell (one template the seam will
be at the front center, and the other template the seam will be
in
the center on the back. For the seam that is in the front, I use
white duct tape on the inside of the star, and on the other template
where the seam is on the back point, I use black duct tape on the
outside of the star. Once the star is fully assembled turn the
star upside down, and spray paint the outside of the star with black
spray paint.